Thursday, 4 August 2016

Fast Find Ranger PLB

I’ve been given a PLB (Personal Locator Beacon) by McMurdo for my trip to the Alps in a few weeks. Here is the low down on this pocket sized life saver.


The beacon provides access to the COSPAS-SARSAT satellite constellation which has been attributed to saving over 37,000 lives since its inception in 1982. When activated the PLB obtains its global position using GPS. It then transmits the co-ordinates via the COSPAS-SARSAT satellites to mission control, who inform the local search and rescue co-ordination centre. All within a couple of minutes. Follow this link to read of some of the many rescues.

The real benefit of this service is when you are out in the wilds or off shore, far from mobile phone signal. A PLB will work ANYWHERE in the world and if you have the misfortune to need it, the service is free of charge once you have bought the beacon. The Ranger PLB retails for around £175 to £200.
The handheld beacon itself is a stocky, rugged little fella. Weighing about 160g and measuring 36x50x112mm. It is an easy to locate bright orange with a tough rubberised case to protect against the expected bangs and knocks it might receive in a backpack or pocket.
Once activated it’ll operate for 24hours, although you could extend this by periodically turning the beacon on and off. The battery is not user changeable so you will need to contact a service centre for a replacement approximately every 6 years.

To operate the beacon:

Caution! This is a single operation device and intended only for use when your life is in critical danger. False activations are extremely expensive as every activation must be taken seriously. You might be held accountable for this cost, and you could be taking resource away from a real emergency.
  1. Flip up the red handle at the top of the PLB.
  2. Pull sharply on the handle to remove the cover. This will break the fixing point so the cover cannot be replaced. (A single spare cover is provided in the box just in case you get curious.)
  3. In my experience the metal blade antenna will probably deploy when the cover is removed. If not ensure it is unwrapped from the beacon and extended to its full height.
  4. Press the 'ON' button.
  5. Ensure that the beacon has a clear view of the sky. It needs to be able to see the satellites orbiting overhead to obtain its position and transmit a distress message. If possible avoid wooded areas, cliffs and deep valleys or ravines. If you are injured and cannot relocate do not worry; the beacon is likely still to work, but it might just take longer to obtain and transmit information.
  6. Initially the strobe will flash rapidly on the top of the beacon to indicate that it is on and searching for a GPS location. When the strobe speed slows this means that it has obtained a position fix, and a long flash followed by three short flashes means an emergency message has been transmitted and help is on the way.
 

Saturday, 30 July 2016

Stans No Tubes Race Sealant Review


No Tubes have been long time leaders in the tubeless sealant market. This year they released a new race sealant which they claim will patch larger holes, and will block them quicker so less pressure is lost. It supposedly achieves this by using a combination of more and larger particles in the solution.

In my experience the standard solution worked great for thorns, but frequently couldn't cope with cuts in the tyre. In preparation for the races ahead and with two news tyres, it was time to find out if the new latex stood up to the claims. After 20 miles on a fast flinty descent there was the tell tail "Phfft, phfft phfft" and wet latex on my legs. It didn't seal immediately so the group stopped. There was a small 5mm cut in the centre of the thread. The others waited while I held the hole at the bottom of the tyre so the latex flowed over the cut. The air flow slowed, but when I tentatively spun the wheel  a few minutes later it restarted. I repeated this process several times, but in the end I gave up and fitted a tube.

20 miles later the same thing happened with the front wheel. This time I could see a thorn still in the tyre. The best plan is usually to leave the thorn in, and the leak was slow so we continued. 10 minutes later the latex continued to spit out with every revolution of the wheel and the pressure was getting lower. So I pulled out the thorn. At this point all remaining sealant poured out onto the road. Time for a second tube.

In summary it couldn't have been a much worse debut. Especially when the new latex comes at such a premium price. To be clear I had followed the instructions to the letter and thoroughly shaken the bottle and poured the solution directly into the tyres. I'd added two cups, the same as I normally would in a 29er tyre, and was running around 20-25psi pressure in both tyres.

UPDATE: A few days later and with both wheels topped up, it was time for my second ride with the race sealant. 3hrs in and only 5 miles from home I felt the latex hit the back of my legs. It was the tiniest little cut, right in the middle of the tread. So small I could hardly see it. Being close to home, this time I was determined for it to seal. I stopped to give it time to dry, I spun the wheel I tried everything, but each time I rode off the latex sprayed out again.

I limped home with a top up for air and a white stripe of sealant up my back! I continue to be very unimpressed with the new Stans sealant.

Wednesday, 27 July 2016

Schwalbe Rocket Ron 2.25 Snakeskin Actual Weight


My intended front tyre for the Grand Raid. Easily the heaviest tyre I'll ever have put on a bike, but hopefully the thicker 'Snakeskin' side walls will protect against flats. In my experience the Rocket Ron rolls well and is predictable in loose or muddy conditions.

Specialized Fast Trak Control 2.0 Actual Weight


I've had a Fast Trak Control on the rear wheel of my bike for over 2 years. Summer and winter it handles all conditions, rolling well and digging in for traction when required. The Control version has thicker side walls which increase protection against punctures compared to the lighter S-Works.

Saturday, 23 July 2016

Grand Raid Training Ride

This weeks training ride to Winchester.
 
92 miles   2458m vertical ascent   7hrs 30min


Monday, 18 July 2016

Spinning up the climbs!

#Absoluteblack 30t oval chainring fitted; it was time for a 6hr training ride. I've been using ovals for several years so there was no adjustment necessary. There are two less teeth than previously on the ring, which should help in the Alps. 
Absolute Black Oval Chainring
Talking of the Alps there is only a month to go before the Grand Raid. So I went in search of the local "mountains". It might be the highest point in Hampshire, but at 271m Butser Hill is only a pimple compared to the 2787m of the Pas De Lona, the final climb of the Grand Raid.
 
My ride stats were 6hrs, 66miles and 2000m of climbs. In some ways completing this ride has helped build my confidence ahead of my Swiss trip. On the other hand the thought of 4 more hours, 10 extra miles and more than 3000m more ascent is somewhat daunting!
 
Two times over Butser and still smiling!
 

Wednesday, 13 July 2016

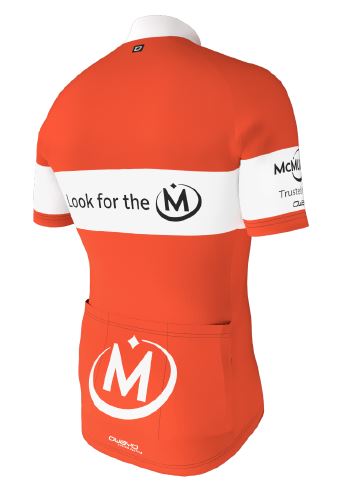
New jersey!

Time for a new jersey design. Hoping it will arrive just in time for the Grand Raid.